


Zuschneidfelle are essential tools for outdoor enthusiasts, particularly those who love skiing or snowboarding. These protective skins allow your skis to glide effortlessly uphill while keeping you stable on challenging terrain. However, cutting zuschneidfelle can often feel like a daunting task for beginners and even seasoned pros alike. The right technique and tools make all the difference in achieving that perfect fit.
Whether you’re prepping for the next big adventure or just trying to improve your skills, mastering the art of cutting zuschneidfelle is vital. With some handy tips and tricks, anyone can elevate their game from novice to professional status in no time. Let’s dive into everything you need to know about cutting these vital ski components with precision and confidence!
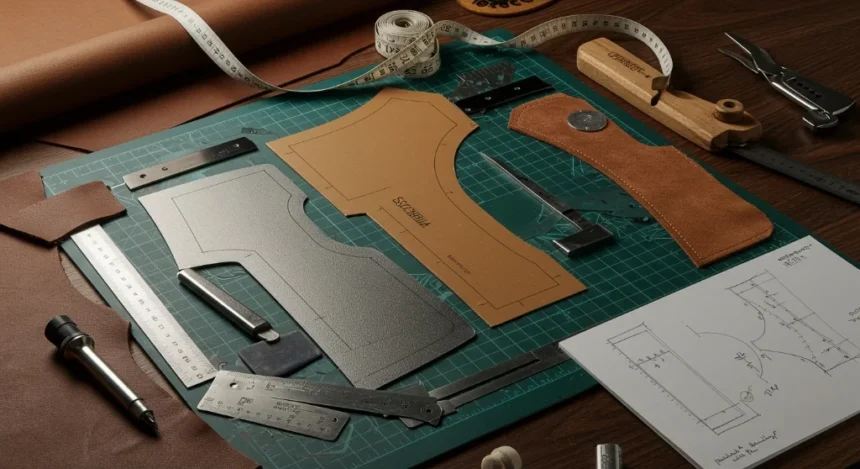
Necessary Supplies for Cutting Zuschneidfelle
To cut Zuschneidfelle effectively, you’ll need the right tools. Start with a sharp utility knife or scissors designed for fabrics. A clean edge makes all the difference.
Next, have a cutting mat on hand. This protects your surfaces and keeps your blade in top condition.
Don’t forget about weights or clamps to hold down the Zuschneidfelle while you work. Stability ensures precision cuts without slipping.
A ruler is also essential for straight lines, especially if you’re working on larger pieces. It helps maintain accuracy throughout your project.
Gloves can add comfort and safety during the cutting process. They help prevent injuries from sharp blades and keep everything neat. With these supplies ready, you’ll find cutting Zuschneidfelle much easier and more enjoyable.
Step-by-Step Guide for Cutting Zuschneidfelle
Start by laying your zuschneidfelle flat on a clean, stable surface. Make sure there’s enough room to maneuver without obstacles.
Next, measure and mark the desired dimensions clearly using a fabric chalk or marker. Precision is key here; take your time with this step.
Once marked, use sharp scissors or a rotary cutter for clean edges. If you’re using scissors, apply steady pressure without forcing them through the material.
Follow along your markings carefully. Avoid cutting too quickly—patience helps maintain accuracy.
After cutting, inspect each piece for any rough edges. A quick trim can ensure everything looks polished and professional.
Store the cut pieces safely until you are ready to use them in your project. Keeping them organized will save time later on when assembling or applying them.
Common Mistakes to Avoid When Cutting Zuschneidfelle
One of the most common mistakes is rushing the cutting process. Taking your time ensures precision and reduces errors.
Another frequent pitfall is using dull blades. A sharp blade makes clean cuts, while a dull one can cause jagged edges and frayed materials.
Not measuring twice before making a cut often leads to wasted material. Always double-check measurements for accuracy; it saves both time and frustration later on.
Failing to secure the Zuschneidfelle properly can lead to slips during cutting. Use weights or clamps to hold everything in place for steadier results.
Neglecting safety gear is a mistake you shouldn’t make. Protective gloves and eyewear help prevent accidents that could ruin your project—or worse, injure you.
Tips for Achieving a Professional Finish
To achieve a professional finish when cutting zuschneidfelle, attention to detail is crucial. Start with sharp tools; dull blades can cause uneven edges and fraying.
Ensure your workspace is clean and well-lit. A tidy area allows for greater focus on precision cutting.
Use a ruler or straight edge as a guide. This will help maintain consistent lines throughout your project. If you need curves, consider using specialized templates to keep shapes smooth.
Take your time during the process. Rushing often leads to mistakes that can detract from the overall look of your work.
Don’t forget about finishing touches like sanding any rough edges or applying an appropriate sealant if needed. This adds durability and enhances appearance significantly, making all your hard work truly shine.
Alternative Methods for Cutting Zuschneidfelle
When traditional cutting methods aren’t your style, consider alternative techniques for Zuschneidfelle.
One option is using specialized rotary cutters. These tools glide smoothly and can create precise cuts without much pressure. They are especially useful for intricate designs.
Another method involves laser cutting technology. This high-tech approach allows for ultra-precise edges and detailed patterns. It’s perfect if you have access to a laser cutter and want flawless results.
For those who enjoy DIY projects, scissors with serrated blades can provide an interesting texture on the edges of your zuschneidfelle. This adds an artistic flair while maintaining functionality.
Don’t overlook the potential of templates or stencils as well. They can guide your cuts, ensuring uniformity across multiple pieces while giving you creative flexibility in design choices.
Experimenting with these alternative methods can elevate your crafting experience significantly!
Conclusion: Mastering the Art of Cutting Zuschneidfelle
Mastering the art of cutting zuschneidfelle takes practice and patience. The right techniques can lead to impressive results, whether you’re a beginner or have some experience under your belt. Focus on gathering quality tools and materials that suit your needs, as these will significantly enhance your cutting experience.
Pay close attention to each step in the process. A methodical approach will help you avoid common pitfalls that can ruin your work. Remember to take breaks if needed; this helps maintain focus and accuracy.
As you refine your technique, don’t hesitate to explore alternative methods for achieving different styles or finishes. Experimentation can often lead to surprising discoveries about what works best for you.
With time and dedication, cutting zuschneidfelle like a pro is within reach! Your efforts will be rewarded with beautifully crafted pieces that reflect both skill and artistry. Keep practicing, stay curious, and enjoy every moment of this creative journey.