


Introduction to 4 AWG Battery Cable
When it comes to automotive repairs and upgrades, selecting the right components can make all the difference. One such crucial component is the 4 AWG battery cable. This robust wiring option is known for its durability and efficiency, making it a favorite among DIY enthusiasts and professional mechanics alike. Whether you’re replacing an old cable or tackling a new installation, understanding everything about 4 AWG battery cables will empower you to ensure your vehicle runs smoothly.
But why choose a 4 AWG battery cable over other sizes? The benefits are numerous — from improved conductivity to increased safety during high-demand electrical situations. Ready to dive into the world of battery cables? Let’s explore how these powerful wires can enhance your vehicle’s performance while providing a step-by-step guide for safe installation!
Benefits of Using 4 AWG Battery Cable
Using 4 AWG battery cable comes with numerous advantages that enhance electrical performance. Its gauge strikes a balance between flexibility and conductivity, making it ideal for various applications.
One of the standout benefits is its capability to handle high currents efficiently. This means reduced voltage drop and improved power delivery, crucial for starting engines or running heavy-duty appliances.
Durability is another significant factor. The thick copper strands resist wear and tear over time, ensuring consistent reliability even in harsh conditions.
Furthermore, 4 AWG cables are relatively lightweight compared to thicker options yet still maintain excellent strength. This makes installation easier without sacrificing quality.
These cables can be used in diverse setups — from automotive uses to solar energy systems — making them versatile additions to any toolkit. Their adaptability ensures they meet various needs while providing top-notch performance every time you rely on them.
Step-by-Step Installation Process
Before diving into the installation, gather your tools. You’ll need a wrench, wire cutters, and some safety gear. Make sure you have everything on hand to avoid interruptions.
Start by disconnecting the battery from the vehicle. Always remove the negative terminal first to prevent any electrical shorts.
Next, take your 4 AWG battery cable and measure it against where you’ll install it. Cut it if necessary but make sure you leave enough length for flexibility.
Now it’s time to connect the positive cable. Securely attach one end of the 4 AWG cable to the positive terminal of your battery using a wrench for a snug fit.
Make sure that all connections are tight and secure before moving onto connecting the negative cable next. This step is crucial in ensuring solid performance of your setup without fluctuations or disruptions down the line.
Pre-installation preparations
Before diving into the installation of your 4 AWG battery cable, it’s crucial to gather all necessary tools and materials. A pair of wire cutters, a crimper for terminals, and a socket wrench should be on your checklist.
Ensure you have quality connectors that fit snugly with your cable. This will help maintain a secure connection throughout its use.
Next, prepare the area where you’ll be working. Clean any dirt or debris around the battery terminals to prevent contamination during installation.
Safety is paramount; wear gloves and safety goggles to protect yourself from accidental sparks or corrosive materials. Disconnecting the existing cables before starting is essential for avoiding shocks or short circuits.
Take a moment to read through any manufacturer instructions that come with your new cable. Familiarizing yourself with these details can save time and avoid potential issues later on in the process.
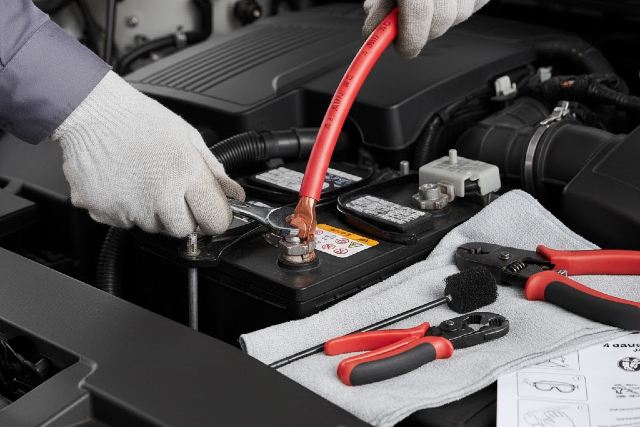
Connecting the positive cable
Start by locating the positive terminal on your battery. This is usually marked with a plus sign (+) and often colored red. Ensure that your 4 AWG battery cable is ready for connection.
Carefully slide the cable’s terminal over the battery post. It should fit snugly, establishing a solid contact point. Use a wrench to tighten the bolt securely — don’t overtighten, as this can damage the terminal or cable.
Once secured, double-check that there’s no movement in the connection. A loose positive cable can lead to electrical issues later on, so it’s crucial to ensure stability.
If you’re using heat shrink tubing, now is an excellent time to place it over any exposed metal before securing everything down completely. Keeping connections protected will help extend their lifespan significantly.
Connecting the negative cable
Once the positive cable is securely connected, it’s time to focus on the negative side. Start by locating the negative terminal of your battery. It’s typically marked with a minus sign (-) and may have a black cover.
Before connecting, ensure that no metal tools are in contact with any live electrical parts. This step is crucial for safety.
Attach one end of the 4 AWG battery cable to the negative terminal. Tighten it firmly using a wrench or socket set, making sure there’s no wiggle room. A loose connection can lead to poor performance or even damage over time.
Now, find a suitable grounding point if you’re not connecting directly back to the battery’s negative post. This could be an unpainted bolt on the vehicle’s chassis that provides good conductivity.
Securely fasten your cable in place and double-check all connections before moving forward with any additional steps in installation.
Safety Tips for Installing 4 AWG Battery Cable
When installing a 4 AWG battery cable, safety should always come first. Start by wearing protective gear such as gloves and goggles. This simple step can prevent injuries from accidental sparks or corrosion.
Ensure your vehicle is turned off before you begin the installation process. Disconnecting the battery while it’s still active can lead to serious hazards.
Work in a well-ventilated area. Adequate airflow helps disperse any gases emitted during the connection process, reducing health risks.
Double-check your connections before tightening them securely. Loose cables can create resistance and heat buildup, which may result in damage or failure over time.
Keep flammable materials away from your workspace. A small spark could ignite something unintended, leading to dangerous situations that are easily avoidable with careful planning and awareness.
Common Mistakes to Avoid During Installation
When installing a 4 AWG battery cable, it’s easy to overlook details that can lead to issues down the road. One common mistake is not tightening connections properly. Loose terminals can cause poor conductivity and even sparks.
Another pitfall is using mismatched or incorrect tools. Using the wrong size wrench or pliers can strip screws or damage connectors, leading to frustrating delays.
Additionally, neglecting to clean battery terminals before connecting new cables is a frequent error. Dirt and corrosion create resistance, reducing performance significantly.
Many forget about proper cable routing as well. Cables should be secured away from moving parts and heat sources to prevent wear over time.
Misplacing the negative connection can result in serious electrical problems. Always ensure that you connect the negative cable last for safety reasons.
Maintenance and Care for 4 AWG Battery Cable
To keep your 4 AWG battery cable in top condition, regular inspection is essential. Check for signs of wear and tear, such as fraying or corrosion at the terminals. If you spot any damage, it’s time to replace that cable.
Cleaning the terminals can significantly extend the life of your cables. Use a mixture of baking soda and water to neutralize corrosion, followed by a thorough rinse with clean water. Dry everything completely before reattaching.
Ensure connections are secure but not overly tight, which can damage the terminal posts over time. A little bit of dielectric grease on the terminals helps prevent future corrosion while ensuring a solid connection.
Store your vehicle in a dry area when possible to avoid moisture buildup that could harm your wiring system. Keeping an eye on these details will help maintain optimal performance from your battery cables for years to come.
Conclusion
4 AWG battery cables are an excellent choice for a variety of applications, from automotive to recreational vehicles. Their robust design and superior conductivity ensure reliable performance.
Installation might seem daunting at first, but with the right steps and safety precautions, it can be straightforward. Following our step-by-step guide allows you to connect your battery securely while minimizing risks.
Remember that proper maintenance is key to ensuring longevity and efficiency. A little care goes a long way in preserving your 4 AWG battery cable. By being aware of common mistakes during installation, you can save time and avoid potential hazards.
Taking the time to understand each aspect of using 4 AWG battery cables will enhance your overall experience and contribute positively to your projects or vehicle’s performance.